Showing posts with label Course Cake Decoration I. Show all posts

Friday, May 27, 2011

How to Make Basket Weave with Piping Roses on Top


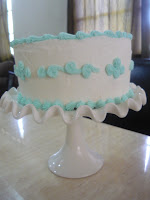
 The Basket Weave technique is very simple but require to put aside some time to complete a cake with this technique. I prefer to use this technique in a small cake, because it is very time consuming and being honest at the end of the day my hand was hurting me, so I  cannot imaging doing this in a large cake... But I have seen large cake done with this technique and they look gorgeous.

For this assignment I used a dommi (6-in) and not a real cake. For making the piped roses and the Basket Weave I use Royal Icing in different consistency.

These roses are called Wilton roses,  the most popular icing flower. To make these roses you will need Tips no. 12 and No. 104, Icing Consistency (or butter cream) -stiff,  Decorating Bag and flower Nail No. 7
The  flowers has 7 petals. I used the Wilton Technique.


Let the flowers dry for 24 hours

Watch a video below, This video will teach you how to make the roses. Beside the class I watched a lot of videos in the net to see over and over how to do the technique before I did my first rose, I think it did not came out that bad.
I suggest you to practice and practice and practice...


I made the roses One day in advance. But you can place the flower on the cake just right after they are made. With buttercream the flowers will be firm outside but still creamy in the inside , with Royal Icing... they will be hard.

Basket Weave, this is my basket weave, as you see in the picture I made a line around the cake  as a guide to start. The I made it all around

For the basketweave you will need Tip no. 47,  Icing consistency: Medium.
I got this video from youtube, Wilton Techniques. I think this is the best video about this, but you can also check in Epicurious, http://www.epicurious.com/video/technique-videos/technique-videos-cakes/1915458772/cake-decorating-101-how-to-make-a-basket-weave/45361727001, that was a Master Class for me. I hope you enjoy it.
For Basketweave variations, try any of the following:
  • Combine Tip No. 47 and tip 16
  • Combine Tip No. 7 and Tip No. 47
  • Single Practice Tip No. 44
  • Single Practice Tip No. 17


Monday, May 9, 2011

Moist Yellow Cake Recipe

Happy Mother's Day my Dear Mami !!!


Can you see this picture, I made this cake for Mother's Day. I was so excited about making this cake and decorate it. This is my second time making flower and the first time that I made the icing right!! WOW ! I am so happy, It is coming out.

My mother is in Venezuela, but my mother-in-law is here, so I decided to give her my creation as Mother's Day present. It look so cute, and I still looking at the pictures and I cannot believe it, I did it myself. My mother-in-low loved it!!

For Mothers' Day the teacher asked us to get a heart shape pan, and bake a cake... but she was very specific to make a cake from scratch. I got a small cake pan for this project, I can call it "a personal cake" well it is not that small, it is the equivalent to a 6" round pan.

The recipe that I tried this time is from The Well-Decorated Cake by Toba Garrett, 
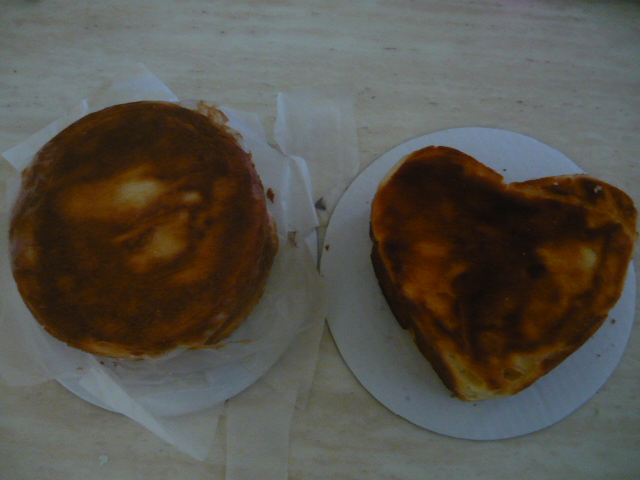
her book have a section with recipes for cakes, icing, filling, etc. I decided to make the MOIST YELLOW CAKE, this recipe was a success, very easy, the cake is very moist but firm, and delicious. I found that this book is very good, very technical and really help to improve or acquire skills in cake decoration. Get the book here.

Here I bring the recipe for this cake, from Toba Garrett.


MOIST YELLOW CAKE (no baking experience is required)

Ingredients:
3 cups (330 g) cake flour
1 Tbsp baking powder
1/2 tsp salt
1 cup ( 8 oz or 230 gr) unsalted butter, room temperature
2 cups (454 g) granulated sugar
5 large eggs
2 tsp vanilla extract
1-1/4 cups (10 fl oz or 300 ml) buttermilk (for buttermilk substitute)

  • Preheat oven to 350 degrees F (175 degrees C). Butter and line with parchment (I used wax paper)  two 8 x 2 -inch (20 x 5 -cm) pans. Set aside (actually I used 1no. 6 -in round cake and 1 no. 6" heart shape cake)
  • In a medium bowl, sift together the flour, baking powder, and salt.
  • Cut up the butter into 1-inch pieces and place them in a large bowl of an elecrica mixer, fitted with a paddle attachment or beaters. Beat for 3 minutes on MEDIUM-HIGH speed until the butter is light and creamy in color. Stop and scrapthe bowl. Cream the butter for and additional 60 seconds.

  •  Add the sugar , 1/4 cup at a time, beating1 minute after the each addition. Scrape the sides of the bowl occacionally. Add the eggs one at a time. 


  • Reduce the mixer speed. Stir vanilla into the buttermilk. Add teh dry ingredients alternately with the buttermilk ( I used buttermilk subtitute). Mix just until incorporated. Scrap thesides of the bowl and mix for 15 second longer.


  • Spoon the butter into the prepared pan (in my case 'pans') and smooth the top with a knife. Lift up the pan with the bater, and let it drop onto the counter top to burst any air bubble, allowing the batter to settle.
  • Cener the pans unto the lower third of the oven and let bake 45 to 50 minutes or until the cake is lightly brown  on the top and comes away from th sides of the pan and a toothpick inserted in the center comes out clean.


  • Note let them cool in the pan. I like to place the cake (hot) on a rack to help air pass below. I believe that cool fastes


  • Here "my heart" without paper and the round cake with the wax paper. Remove the paper very carefully to do not pull the cake.
  • And now the beautiful heart, decorated with ROYAL ICING - recipe here. In the Caribbean we use more ofter the Royal Icing than the Buttercream. I add a little bit of read to create a very light pink. I add a little bit more of red to teh icing to make the shells and I add color gel red directly to the bag (3 lines) and I put the icing int the piping bag to create the effect that you see in the shells (Tip no. 18). Video how to make shells here.
  • For the roses I added more decorator's sugar to the icing (pink) to make it harders and make the roses, and I added more red gel color to the icing, to create a more intense pink color. I made 6 no. 3 petal roses and 6 no. 5 petal roses.I put three litle piping roses (3 petals) at the side to fix a problem with the icing.  Wilton Tip 104. I will post very soon how I made the roses.

  • Note: I wrote first the message (Wilton Tip No. 4), then in the space left I placed the flowers.

  • I add some leave in a light green color, I used Wilton tip No. 352, I found that it is the easier way to make a leaf.


  • The cake ready and in the box.


Moist Yellow Cake on Foodista

Sunday, May 1, 2011

Using Cake Dummies to Practice Cake Decoration

When I joined the cake decoration class, I knew that it was going to be expensive, you know all the material that you need to buy, and you you do not have anything in your kitchen to decorate cake, that means that you have to buy everything. But the real drama start with the baking... I was wondering if I had to bake one or two cakes every weekend, and who will eat all that cake, if I have to practice... Oh my God do not tell me that I have to bake more than twice a week.

I got so much relieve when the teacher told me about the dommie cakes -piece of Styrofoam cut in the shape of a cake- these dummies comes in different shapes and sizes. I had never heard about this but, I found that it is ideal when you are learning cake decoration or when you want to put together a portfolio of your cake decoration projects.

The dummies cakes comes in the form of square, heart, round, oval, etc. Any shape that you may need for your project.

I buy may cake dummies locally, but you can find a good store online call  the Foam Studio, the prices are very good. If you like to buy online this is a very good website. Beside they have a way variety of sizes and shapes. See  below some pictures taken from The Foam Studio.


When you are practicing your decoration techniques in the dummies you do not have to deal with the cake crumbs, that can be really frustrating for a new decorator, eventually you will deal with that, but learn how to decorate  first.

You can use Royal Icing, Butter cream and Fondant on cake dummies. You can re-use you cake dummies, only place it the kitchen sink under warm water after removing your icing from on it. Let it dry before use it again. 

As I told you before doing dummies cakes and decorating them is a great way to make several different looks to create a photo portfolio for your cake business if that is what you are planning to do. So whenever you create a dummies cake that turns out great take a picture of it and add it to your portfolio.

The picture below is my first dommie cake decorated, I was practicing my royal icing and some shells, writing and starts, if you do not tell nobody will believe that this is not a real cake.


Dommies decorated by: Karina Espinoza-Gift


So get a dommie and practice, and practice until you get it right, do not worry about the baking.

Thursday, April 21, 2011

Buttercream Icing


Ingredients:

Makes:
About 3 cups of icing.

Instructions:
(Medium Consistency)
In large bowl, cream shortening and butter with electric mixer. Add vanilla. Gradually add sugar, one cup at a time, beating well on medium speed. Scrape sides and bottom of bowl often. When all sugar has been mixed in, icing will appear dry. Add milk and beat at medium speed until light and fluffy. Keep bowl covered with a damp cloth until ready to use.
For best results, keep icing bowl in refrigerator when not in use. Refrigerated in an airtight container, this icing can be stored 2 weeks. Rewhip before using.
For thin (spreading) consistency icing, add 2 tablespoons light corn syrup, water or milk.
For Pure White Icing (stiff consistency), omit butter; substitute an additional 1/2 cup shortening for butter and add 1/2 teaspoon No-Color Butter Flavor. Add up to 4 tablespoons light corn syrup, water or milk to thin for icing cakes.
NOTE: Changes in Wilton's traditional recipes have been made due to Trans Fat Free Shortening replacing Hydrogenated Shortening.

Recipe by Wilton

Buttercream Icing on Foodista

Wednesday, April 20, 2011

The Worse Cake Decorating Experience Ever!!!

When I joined the Cake Decoration course last month I never thought that in such beautiful activity you can feel so frustrated. You see in the TV how easy the professional make those cake, how easy they decorate the cakes, so you think "it is not that hard" but the reality is that the "first time is always painful".

So I am hear shearing my pain and frustration. The frustration of decorating a real cake for first time, I say "real" because in class we have decorated cake. Believe me it is far easier that with a real cake... the crumbs!!! there is not crumbs.

I went to my class last Saturday very happy with my  "real cake" - because of lack of time, I decided to make a box cake -no matter. It was all right, the problem, this type of cake is very light, and usually is decorated with frosting, in Trinidad we ussually use royal icing to decorate the cakes, and frosting too, but in this occacion, it was royal icing.

I learned a lot from this experience, I know what I do not have to do. But let me tell you I heated this cake, every thing when wrong.

1) the cake was too light for the royal icing,
2) the icing did not have the  the right consistancy, it was too soft and shiny.
3) when applying the first coat of royal icing, all the crubs came out and mess the icing.
4) I did not let the first coat of icing get hard before appling the second coat.
5) the second royal icng had the right consistancy, but I should remove the first icing and discard, and start over again with the "good" icing.
6) because the first coat of icing was too light and soft after I applied the second coat, the entire icing start to run out.

In conclussion it was a desaster. I have the proof. Take a look at the picture below and feel the pain...


At the end I remove the entire icing, not to fix it, but to eat the cake... I was son desapointed with this cake that I did not want to see that icing again.

I know something for sure... I need to practice, and practice and practice.

It not that bad after all, I learned from the experience...

LinkWithin

Related Posts Plugin for WordPress, Blogger...