Hi my friends, this is my second time making cake balls (a version of the cake pops without the stick), I bought the book Cake-Pops by Bakerella, Angie Dudley , a while ago and I have tried to make them at home, first for my baby first birthday party last February and last week for my friend's husband birthday party. I have to confess that this is the easier thing I have ever made in the kitchen. The only problem for me was to find the Candy-melt from Wilton
 , in the city where I live, forget mail order, that does not work here.
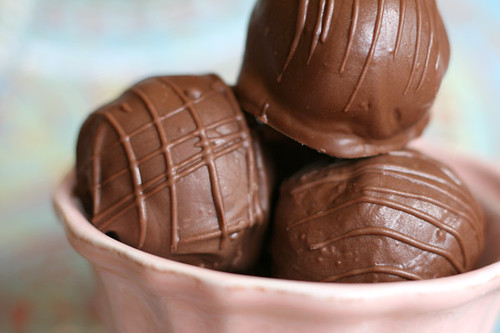
, a while ago and I have tried to make them at home, first for my baby first birthday party last February and last week for my friend's husband birthday party. I have to confess that this is the easier thing I have ever made in the kitchen. The only problem for me was to find the Candy-melt from Wilton, in the city where I live, forget mail order, that does not work here. Both times I got at the point of frustration trying to get the same finish that Bakerella has in her blog or book. If you can get the candy melts, you are done. I had to cover the cake pops with baking chocolate, the flavour is very rich and people really like it, but the price goes up, and temper the chocolate is not easy. But I did my try and it was perfect. At lesat for me and the time that I have available to make 4 dozen cake balls.
candy melts, you are done. I had to cover the cake pops with baking chocolate, the flavour is very rich and people really like it, but the price goes up, and temper the chocolate is not easy. But I did my try and it was perfect. At lesat for me and the time that I have available to make 4 dozen cake balls.I was in a hurry packing everything to go to my friend party, so I take the picture just after covering the cake pops.
Chocolate Cake Balls:
Source: CAKE POPS , Tips, Tricks and Recipes for More than 40 Irresistible Mini Treat by Bakerella, page 11.
CAKE POPS, Tips, Tricks and Recipes for More than 40 Irresistible Mini Treat by Bakerella, page 11.Pictures: Karina Espinoza-Gift
(Makes 48 cake balls)
You'll need
18.25 ounce box cake mix - chocolate or other favorite flavour
- chocolate or other favorite flavour9-by-13 inchcake pan

16-ounce container ready-made frosting
Large metal spoon
Plastic wrap
32 ounces (2 pounds) candy coating or baking chocolate
or baking chocolateDeep, microwave-safe plastic bowl
Toothpick
Resealable plastic bag or squeeze bottle (optional)
1. Bake the cake as directed on the box, using a 9 x 13 inch cake pan. Let cool completely.
2. Once the cake is cooled, get organized and set aside plenty of time (at least and hour) to crumble, roll , and dip 4 dozen cake balls.
3. Crumble the cooled cake into a large bowl (as you see in the picture below). You should not see any large pieces of cake.

4. Add three-quarters of the container of frosting (you will not need the remaining frosting). Mix into the crumbled cake. Using the back of a large metal spoon (or your hands -very clean), until thoroughly combined. If you use the entire container, the cake balls will be too moist.


5. The mixture should be moist enough to roll into 1-1/2 inch balls and still hold a round shape. After rolling the cake balls by hand, place them on a wax paper-covered baking sheet.

6. Cover with plastic wrap and chill for several hours in the refrigerator, or place in the freezer for about 15 minutes (I took this option, I did not have too much time). You want the ball to be firm but not frozen.
7. Using Baking Chocolate: Place the chocolate in a deep, microwave-safe plastic bowl. Follow the indication from the manufacturer to melt the chocolate in the microwave. Work with 16 ounces of chocolate at a time. When the chocolate is melted and shiny (do not try to add any liquid, butter or anything - from experience, if you add any thing the texture of the chocolate will change at the point that will be imposible to use it).
8. Coating: Take a few cake balls at a time out of the refrigetrator or freezer to work with. If they are in the freezer transfer the rest of the balls to the refrigerator at this point, so they stay firm but do not freeze.
9. Place one ball at a time (as shown in the picture below) into the bowl with candy coating or melted chocolate. spoon extra coating over any uncoated areas of the cake ball to make sure it is completely covered in candy or chocolate coating. Then lift out the cake ball with a spoon. Avoid stiring it in the coating, because cake crumbs can fall off into the coating.

10. Holding the spoon over the oer the bowl , tap the handle of the spoon several times on the edge of the bowl until the excess coating falls off and back into the bowl. This techniques create a smooth surface on the outside of the cake ball.
11. Transfer the coated cake balls to the second wax paper-covered baking sheet to dry. Let the cake ball slide right off the spoon. Some coating may pool around the base of the ballsonto the wax paper - as you see in the picture below. If so simple take a toothpick and use it to draw a line around the base around the cake balls before the coating set. Once the coating sets, you can break off any unwanted coating.

12. Repeat this with the remaining cake balls and let dry completly.
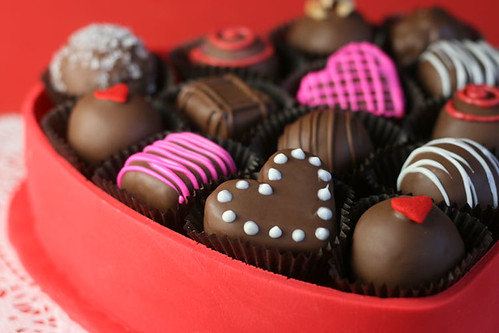
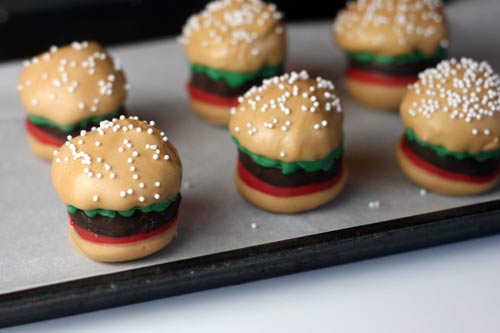
13. Decorate the cake balls, with sprinklers or with the remainin chocolate or candy coating, pour the coating in a squeeze bottle and drizzle it over the tops in a zigzag motion to decorate.
14. You can make the cake balls ahead of time and store them in an air tight container on the counter or in the refrigerator for several days.
Some Cake Balls decoration ideas
No comments:
Post a Comment